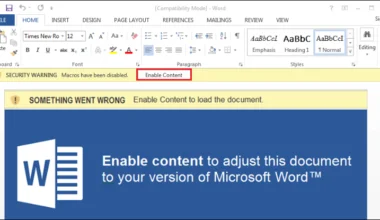
Ever received a Security Incident where a user machine got infected by a malicious attachment?
And as an Incident Responder, you suspect having a malicious macro that takes advantage of Windows’ own legitimate tools like CMD and PowerShell. Maybe you are not sure how to quickly extract and analyze macros without going through a lot of hassle?
Your ultimate goal would be to quickly extract malicious macros from a file and triage incident so that you can contain the malware and limit its spread.
Incident Response (IR) is not just about mitigating incidents but how quickly you respond to those incidents such that the malware doesn’t do much damage to the system(s) and future attacks can be prevented promptly once you know how to proceed with a particular case.
As malware authors keep their malicious code highly obfuscated, it becomes really difficult to go through the 100s of lines of obfuscated code, understand its functioning, and try to properly de-obfuscate it so that the code makes sense. It is a time-consuming process, and time is the crucial factor in responding to such incidents.
But if you want to have a sneak peek at how we can analyze a macro manually, then have a look at the link below:
Read more: De-Obfuscating Emotet’s Malicious VBA Macro
So, In this post, I’ll be demonstrating how quickly we can extract malicious macros from a document, be it a word doc file or a pdf file, or any other attachment, without going into much detail about the functionality of what the macro does.
The goal here will be to quickly extract the macros, deobfuscate and identify the C2 servers from where the malicious binaries will be downloaded.
But some would say such information can be extracted by running the sandbox like Hybrid Analysis, VirusTotal, or Cuckoo. I agree, but what’s the fun of just dropping the file in a sandbox and waiting for the report to appear.
I think that’s fine, but it doesn’t answer my question about “how things work” and “how much info. is extracted,” and I am more of a practical guy, so… I think you got what I am trying to say.
Warning
All my analysis is done on an isolated machine Flare VM as I will be infecting that machine intentionally. And once done will revert back to the clean snapshot.
So, Let’s Get Started
Maldoc Analysis
Ok, so enough talking, and let’s dive into it. I was provided with a malicious document after an incident where the user opened a malicious word document and enabled macros. The infection was, however, prevented by one of the security tools, and I was asked to investigate this further.
SHA1 of a doc file – 644f4dd0405eef53114a7a5a75aadb4d

Maldoc Analysis Tools
Initially, to check whether a document has macros embedded, one can use a tool called the Oletools suite provided by Didier Stevens. Oledump returns a list of the document structure and specifies which module contains the macros which can be identified by M or m tag. In our case, modules 10, 11, and 12 show the presence of macros.

Another tool olevba, which is a part of oletools, shows the summary of the word document and tells what all suspicious indicators are present in the document. Here, AutoExec is the most important one to remember as it tells that the macros will run the moment the word document is opened. Rest it tells the presence of base64 encoded strings.

Once we have identified that our document is indeed malicious and contains macros, our next step would be to extract macros. But we will not be extracting manually but directly from memory after executing a malicious document.
A tool called API monitor would do its purpose.
We will actively monitor the API calls our word document calls when it is launched, and macros are enabled. Here, I am monitoring some of the API calls like CreateProcessW, CreateProcessA, GetCommandLineA, GetCommandLineW. CreateProcess is responsible for creating a new process whereas GetCommandLine retrieves the command-line string for the current process.
Notice A or W as a postfix after the function calls. It simply indicates that the function call accepts either string parameters where A is for ASCII strings and W for wide-character strings.

After launching the malicious word document (don’t click the macros yet), we will start monitoring the process.

And soon after enabling the macros, we can see that the PowerShell process is being launched, and a command-line code that it executes is also visible. Here, we will click on the monitor button and continue monitoring this process. It is clear that the macro launches the Powershell and performs some commands.
Our next step would be to extract this Powershell obfuscated code directly from memory.

If we go and check the API monitor dashboard, we can see that our Powershell code is visible under the API call GetCommandLineA and the module which calls this function is a module named rasman.dll. Voila.

As we could not see the complete Powershell code in the API monitor, we can use another tool, Process Hacker, to extract that obfuscated code. In the Processes tab, look for the process WINWORD.EXE.

Once we are in the properties section of that particular process and under the Memory tab, performing a string search will provide us with the whole list of strings residing in the memory.

Filtering to what string we are looking for, powershell -w hidden, as we saw earlier during monitoring API calls, a result was provided. Below are the 3 results where all the strings were the same. So, clicking on any results and saving them to a separate text will copy our fully obfuscated Powershell code.

Below is the Base64 encoded code that we have extracted from the memory without actually looking at the macro modules. This is one of the fastest ways to extract shellcode from memory. But other methods do exist as well. Any other method that suffices for your purpose is recommended.

Now, to look at what’s actually happening behind the code, we have to de-obfuscate the above code. Since it is a base64 encoded code, I will use one of my favorite tools, CyberChef, to decode it. It can be used for other operations as well and is not just limited to Base64. CyberChef actually works based on recipes and provides the flexibility of using a ton of operations on a set of code.
After decoding the Base64 code, the output seems to make sense a little, but it is still hard to read as it still has a lot of gibberish code.
So, let’s clean it up.

After applying some of the operations to our code, it looks a lot nicer now, and we can see the presence of 5 URLs (C2 servers) from where more binaries will be downloaded to the system and then executed. The script also uses the environment variable $env:userprofile to fetch the user’s profile directory of the logged-in user.
The file is then saved to the user’s profile directory (C:Users<Username>) with the file name as 47.exe.
Further, it also checks whether the dropped file is greater than or equal to the size of 34 KB. If the dropped file is greater than or equal to the mentioned size, it executes the file 47.exe from the user’s profile directory using the System.Diagnostics process, which provides access to local and remote processes and enables you to start and stop local system processes as per Microsoft documentation.

One of the recipes of the CyberChef is to extract URLs from the deobfuscated code without modifying anything. Pretty interesting.

I was quick enough to triage the incident, but while trying to get those binaries, 2 URLs were already down, and was managed to get 3 binaries, all having the same hash values but with different names.
Because these C2 servers don’t stay for long, a quick triage is required to identify such C2 servers and extract binaries out of them so that the advanced analysis can be performed later.
Indicators of Compromise (IOCs)
- SHA1 (a9QKWhDB.exe) – c288b07fe8e4bdac648373b463c6a0c41347ca69
- SHA1 (47.exe) – c288b07fe8e4bdac648373b463c6a0c41347ca69
- Delivery URL – hxxp://rmcentre.bigfilmproduction[.]com/wp-includes/LrOqh
- Delivery URL – hxxp://lecadeaugourmand[.]fr/47mn04/oS8DkV/
- Delivery URL – hxxp://datnentayhanoi[.]info/wp-includes/pyZrddg/
- Delivery URL – hxxp://bietthuvinhomesgialam[.]xyz/cgi-bin/acB4q4y/
- Delivery URL – hxxp://clickbankbreakstheinternet[.]com/oA6enI8/
Conclusion
Malicious word document is one of the ways that leads to cyber incident. Hence, it becomes utmost important to know how such malicious documents or maldoc work and how you can extract these malicious macros to further triage incident.
Well, there can be many ways on how you can extract malicious macros but what matters most is how quickly you can extract those when it comes to real security incident.
Some malicious documents will take up all your time in case you end up looking at the internals and try to figure out how things work. But this won’t help in case of an ongoing security incident as your ultimate goal would be come to the conclusion, triage incident and contain its spread.
We looked at several maldoc analysis tools with which you can analyze and extract malicious macros in your future corporate incidents.
Hope this have helped you. And In case of any queries comment us below and we’ll get back to you.


1 comment
Hi there to all, how is all, I think every one is getting
more from this web site, and your views are pleasant in support of new users.